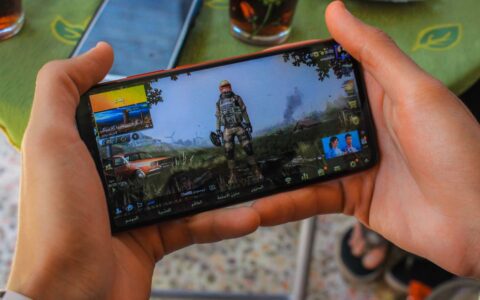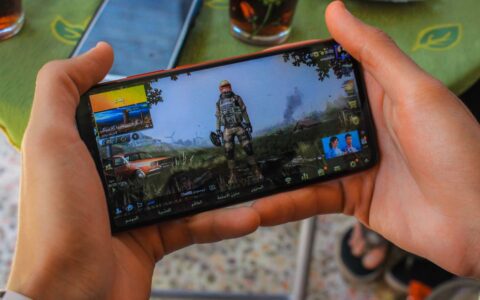


Booyah runs are won in the first ninety seconds. Nail your drop, grab the right guns, and you’ll skip the panic-looting that gets most players killed before the first circle.

Read the flight path before your feet leave the plane
The mini-map draws a white line the moment the plane spawns — that’s your flight path, and it decides everything. Spots directly under the line get swarmed because they’re the fastest drops for everyone; spots off to the side stay quieter. If you’re still learning, land one or two named locations away from the line’s dead center and you’ll usually get a clean 20 seconds to loot.
Timing the jump matters as much as the destination. Open your map, tap where you want to go, and jump when the plane is roughly perpendicular to it — Free Fire caps horizontal glide distance, so leaving too late means you skydive straight down onto a picked-over roof. Aim your camera at the ground and dive steeply to hit the deck first; only flatten out to cover long horizontal distance.
Watch how many parachutes peel off toward your spot on the way down. If three or more players are tracking the same building, either commit hard and grab the first gun you see, or pull your glide toward an adjacent house and let them fight each other. Landing second in a crowded spot is a death sentence — you want to be the one holding a weapon when the scramble starts.
Bermuda landing spots that match your skill level
Bermuda is still the ranked default, so know its rhythm. For high-tier loot with a fight attached, Clock Tower and Peak are the classics — dense, vertical, and packed with guns, but you’ll almost always contest them. Drop these only when you’re confident in close-range aim, because the first 30 seconds are pure chaos and gloo walls come out fast.
For a calmer start with solid loot, aim for Katulistiwa, Mill, or Nurek Dam. These have enough buildings to gear up a full squad without the four-team pileups you get at the marquee spots. Katulistiwa especially rewards a quick sweep: grab a rifle and a shotgun, then rotate inward while the hot-drop lobbies bleed each other out.
If your goal is climbing rank without dying early, edge spots like Pochinok, Mars Electric, and the small unnamed house clusters along the coast are your friends. Loot is thinner, but you land alive nearly every time, and staying alive is what actually moves your rank. A boring drop that reaches the top ten beats a flashy one that ends in a gray screen at 48 players remaining.
Whatever you pick, learn two or three spots cold instead of chasing a new location every match. Knowing exactly which room holds a shotgun and where the gloo walls spawn shaves seconds off your loot, and those seconds are the difference between rotating on your terms and getting caught in the open.
Build a starter loadout that wins the first fight
Free Fire’s early game is decided at close range, so your priority is a reliable short-range gun before anything else. The MP40 is the king here — absurd fire rate, easy to control up close, and it shreds before enemies can gloo up. If you can’t find one, an UMP or MP5 does the job. Spend your first thirty seconds finding one of these, not a scope.
Pair it with a shotgun for one-shot pressure indoors. The M1014 and M1887 both delete players at point-blank range, which is exactly where most early fights happen. A shotgun-plus-SMG combo lets you push aggressively through houses without ever needing to peek a long sightline you’ll lose.
Don’t sleep on utility. Grab a vest and helmet immediately — level 2 armor turns a lost fight into a won one — and carry at least a couple of gloo walls. Gloo walls are the single most important item in the game; they let you block damage, revive teammates safely, and reset a fight you’re losing. Two grenades round out the kit for flushing enemies out of cover.
Save your medium and long-range weapons for when you actually have them. An M14, SCAR, or AK is great once the zone shrinks, but don’t waste early inventory space or time hunting an AWM you’ll rarely get a clean shot with. Loot for the fight you’re about to have, not the one you imagine in the final circle.
Free characters and pets that carry your early game
You don’t need to spend a single diamond to run a strong early-game character. Kelly boosts sprint speed, letting you reach cover or chase a knock faster; Moco tags enemies you hit so your squad can track them; and Ford cuts damage taken outside the safe zone, which is quietly clutch when you land on an edge spot and have to run. All three are cheap in gold or arrive through events.
Miguel is a favorite for aggressive players — every kill hands you EP, which converts to health, so a hot drop that goes well keeps you topped up without burning medkits. The standard aggressive build mixes an active skill like Alok with passives like Kelly and Miguel, and you can assemble most of it for free over a few weeks of daily play.
Pets matter more than new players realize. Falco boosts diving speed and glide distance, so you reach the ground first and win the loot race — it’s the best early-game pet, full stop. Mr. Waggor periodically produces a gloo wall when you’re out, and Rockie shaves cooldown off your active skill. Any of these upgrades your first minute more than a flashy gun skin ever will.
Earning them without paying is genuinely doable. Log in daily for the free reward track, finish weekly missions for gold and character tokens, and grind the free tier of the Booyah Pass, which regularly hands out characters and pets. If you want a little legit spending money, apps like Google Opinion Rewards pay small Play Store credit for surveys — no generators, no sketchy APKs, just slow, safe progress.
Rotate smart and turn a good drop into a Booyah
Surviving the first fight is only half the early game; the other half is moving before the zone forces you to. As soon as you’ve looted, check the safe-zone circle and start drifting toward its edge rather than its center. Rotating early means you pick your cover and your angles; rotating late means sprinting across open ground while campers on the ridge line farm easy kills.
Use gloo walls as portable cover, not just panic buttons. When you have to cross open terrain, throw a wall ahead, sprint to it, then throw the next — leapfrogging across a field is far safer than betting nobody’s watching. In a losing trade, a wall buys the two seconds you need to heal or reposition.
Be smart about third-partying. Hearing a fight nearby is tempting, but rushing in blind usually means you’re the third team that gets cleaned up by a fourth. Let the two squads finish, then push the weakened winner while they’re reloading and healing. Patience wins more early fights than aim does — the player who picks the moment beats the player who forces it.
Keep an eye on the player count, too. Early aggression is great when 40 people are alive and mistakes are cheap, but once it drops under 20, shift toward positioning and information. Landing well and looting fast only matters if you convert that head start into a spot in the final circles.